Hello guys Today i am introducing Whatsapp New Features in 2020. So Guys recently whastapp Tweet with new and Usefull Features, We are discuss and explain a new whatsapp Features.
So guys we know whatsapp is most popular messaging platform world wide, its 1Billion downloads in playstore.
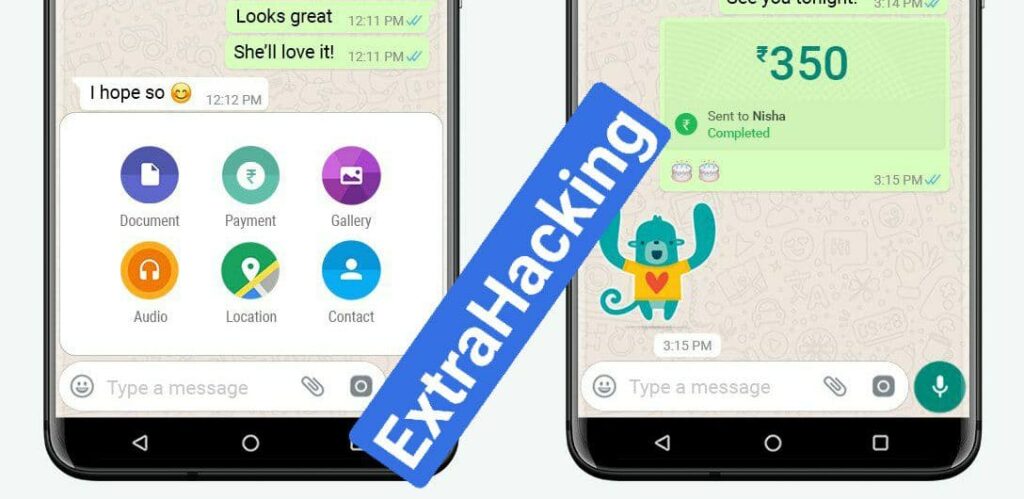
First of all whatsapp introducing a new features for Indians peoples Only, so Guys if you are Indian then share this artical with your friends and family. So guys Whatsapp finally release UPI Payment Options. Now you can send and receive Money buys using whatsapp payment Option.
For using UPI in whatsapp first of all update your whatsapp in playstore.
After update you can see the Payment option in three dot option, tap here and link your bank account as like PhonePe and Google pay and other UPI option. you can also See the payment option on every Chat like this Image.
Whatsapp New Disappearing Feature
Now whatsapp Release Disappearing Feature, You can use this Feature to Disappear Message of last 7 days. you can see this Feature to under Profile Section. This feature can help you to delete the message of last 7 days, like Telegram, But in Telegram you can delete message any time but in whatsapp Disappearing Feature You can delete of last 7 days only. How did You Like this Feature, Comment below.
Storage Manage Feature
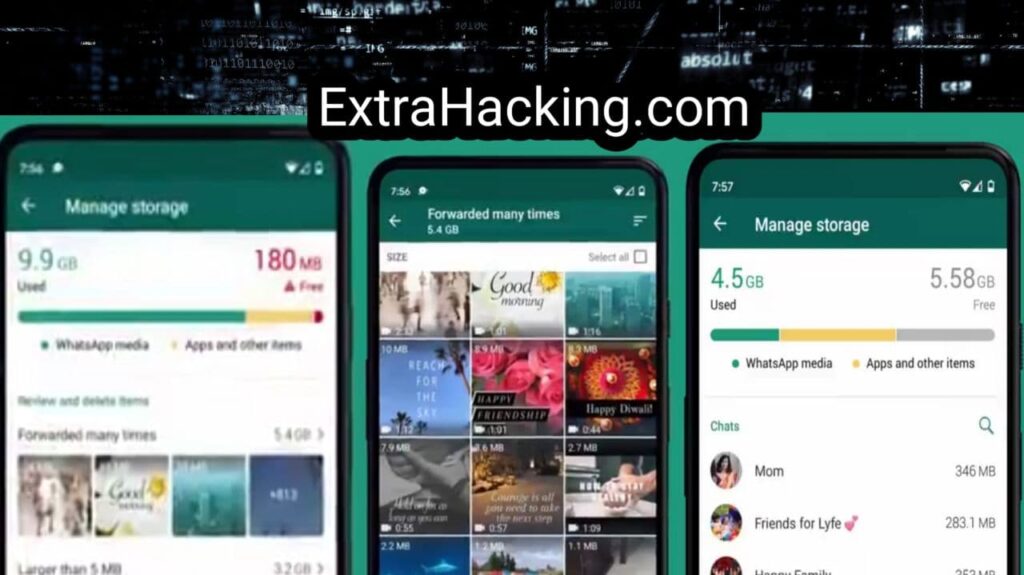
Now you can see Storage Manage feature on the Whatsapp, by using this feature you can manage all image, Video and other Big files that means you can easily delete unwanted files like Image video pdf and other files too.
This new storage management tool can be found in Setting > Storage data > manage Storage
Whatsapp New Feature 2020
This Feature is Really Helpfull Because we can storage more and more unwanted or unnecessary files and these files can full our storage, but we can use this storage management tool for delete files, and you can filtered big to small files and select all the files which you can want to delete from your phone.
If you can Like this Feature Share This blog with your Friends and Family.
★★★★★
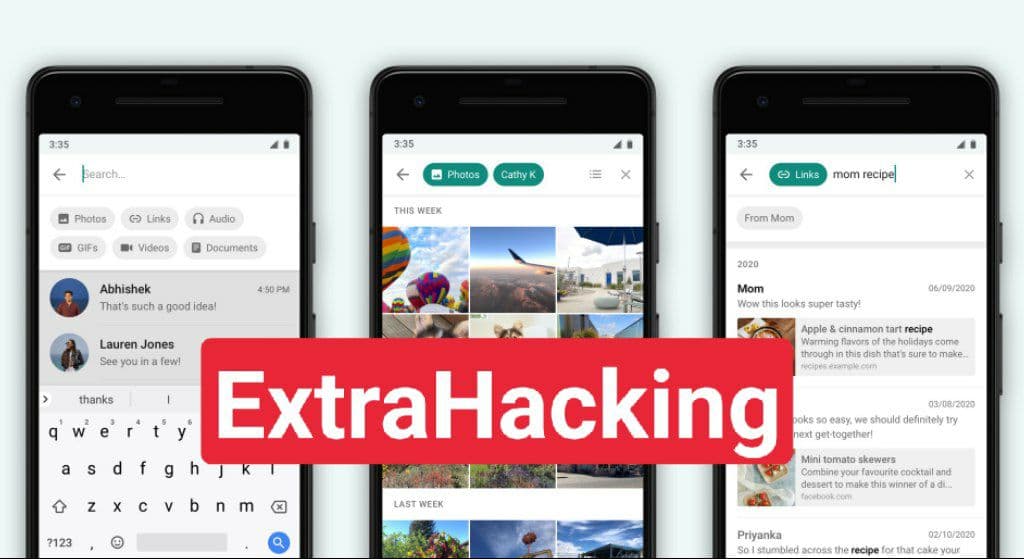
Easy Search Feature
Whatsapp easy to find any files like (Image, Gif, Video, Audio, Documents, Links) on whatsapp, You can see The Example on give Screenshorts.
Whatsapp New Feature 2020
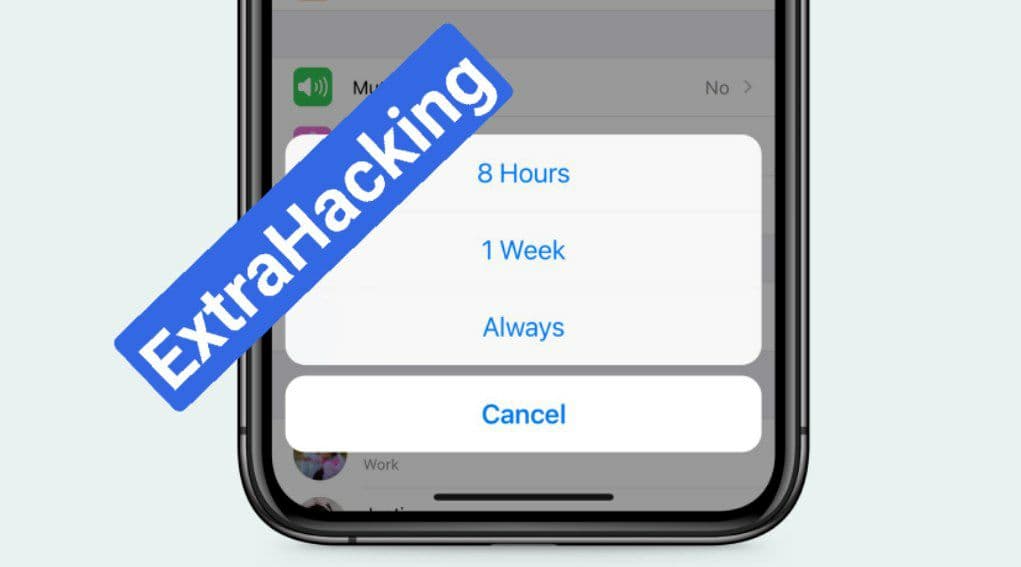
Mute Forever New Feature
Whatsapp Introduce new feature Mute Forever, That means you can mute any chat forever, in previous whatsapp update we mute chat only 1 Week maximum, but now you can mute any chat forever life time.
Whatspp new feature 2020
I thing this is also a good feature, But i want your Opinion, can you Like this Feature just comment below with your opinion.
If you want more Updates Join our Telegram Channel
Hello Guys I am Rk, and Today i can post How to Use iPhone for Control your mac book or iPad like you can lock, unlock, Browse files, Play Music that means you can control all these think with you single iPhone.
Your iPhone and Mac can speak to each other in many ways, allowing you to start work on one device and seamlessly switch to the other, share clipboards between the two, and pick up phone calls and answer text messages on both. The compatibility is incredible, but there’s even more you can do by incorporating third-party software into the mix.
By configuring a few settings on your macOS computer and installing Momentous Studio’s free app called Gateway onto your Mac and iPhone, you can remotely control your computer from your iPhone. That means you can do things like putting your Mac to sleep, locking its screen, restarting it, shutting it down, muting its audio, and changing its volume.
How to use Your iPhone to Control your macbook or iPad?
The first half of the getway software is a Desktop client that you can download for free from the Momentous Studio website or the link below directly. It’s not avilable in the Mac app store, so you need to get it from the site or below.
The app only works on macOS 10.13 High Sierra and later.
Step 2: Install Gateway Desktop for Mac
Double-Click the DMG file you just downloaded (which should be in your “Downloads” folder) to begain the installation process. When the disk image opens in a new windows, add Gateway Desktop to your “Applications” folder, which is as easy as dragging the software icon over to the folder icon.
Now, from your “Applications” folder, double-click on Getway Desktop. Because the software is from a third party, Apple will ask you if you’re sure you want to Open it. Click “Open” to continue. (You may need to adjust your Gatekeeper settings if you don’t see the “Open” option.)
Step 3: Give Gateway Desktop Full Disk Access
The first time you open Gateway Desktop, it will talk you through some information.
On the last page, it’ll ask you for a few permissions. First, the app need “Full Disk Access,” Which is necessary if you want to be able to intreact and control your Mac from your iPhone. You can click on the arrow button to open up your “Security & Privacy” settings to begain.
If you hit “Next intead, You can get to the settings manually. Before doing so, click on the Gateway Desktop icon on your Mac’s menu bar, click the ellipsis, then “Quit.” Doing so now means you won’t be asked to do so later.
Open up system Perferences, then click “Security & Privacy.” Next, make sure you’re on the “Privacy” tab, choose “Full Disk Access” from the left pane. If your settings are locked, click the lock in the bottom left, enter your user password, and click “Unlock” so that you can make changes.
Next, If you don’t see Gateway in the list of apps, click on the plus (+) sign, find and select “Gateway Desktop,” choose “Open,” and make sure the box next to it is checked.
Step 4: Give Gateway Desktop Accessibility Access without closing out of locking your settings, you’ll want to give Gateway Desktop “Accessibility” access too.
This also allows Gateway to control your Mac for you from your iPhone requests, So choose “Accessibility” from the left pane, then check “Gateway” on the list. If it’s not there, click the plus (+) button, select “Gateway Desktop,” and hit “Open.” Feel free to click the lock in the bottom left to prevent any further changes, and exit System Preference.
Step 5: Trun gateway Desktop back on Gateway Desktop needed to be off for the above preferences to take effect, so if you didn’t close it before, do do now.
Then, Open it back up from the “Applications” folder.
Step 6: Choose a password for remote Access(Optional)
WIth gateway desktop open and running on your mac, click on its icon in the menu bar, click the ellipsis, then select “settings.” Make sure you’re on the “Security” tab in the new window, then enter a password in the field, and exit the settings. This step is optional since you don’t need a password, but it’s an extra layer of security, so it’s recommended.
The Mac side of things is almost ready, but now it’s time to install the Gateway app on your iPhone. While the desktop app isn’t available in the Mac App Store, the iPhone app is available in the iOS App store. It requires iOS 13.2 or later and is comatible with the iPhone, iPad and iPod touch.
Step 8: Find Your Mac in tehe Gateway Control
Open the Gateway app on your iPhone, then wait for your mac to appear. If you don’t see it, make sure that your Mac and iPhone are on the same Wi-Fi network, then try again. Your Mac’s default name and IP address will be listed when the device is found. Tap that, and you’ll be prompted to enter your password and hit “Connect”. If you didn’t set up a password yet, just tap “Connect” without one.
Step 9: Use Gateway to control Your Mac Remitely
When you have access to your Mac in your iPhone’s app, you’ll see the system Control remote. With this remote, you can do all of the following. Just note that when you select specific feature, you’ll need to grant more privileges to the Gateway Desktop on your Mac before you can use them (view Step 11 to see how).
Sleep: This will put your computer’s screen to sleep without locking it.
Restart: This will restart your computer.
Lock Screen: This will lock the screen so that it’s password-protected.
Shut Down: This will turn your computer off completely.
Mute: this will silence all audio coming from the computer.
Volume: This slider lets you change the volume of the audio coming from the computer.
Step 10: Add More Controls for your Mac
Those are just the basic features abouve. If you don’t mind spending a few bucks, check out the shopping cart icon to view the Gateway Store. Here, you’ll find one-time purchse, called “Blocks,” that add capabilities to your remote access. Some of them are free, including Apple Music, Podcasts, Screenshot, VLC, and Force Quit.
After you add Blocks, you’ll see them on the main System Control screen for your Mac. You can tap the Blocks icon up top to view them all in a short list, where you can drag and drop to reorder how they appear in the remote. Tap “Done” to exit these settings
Step 11:
Give Gateway Desktop More Privileges
We won’t go into how every control or Block works, so you can play around with those to see how they operate. However, some of them will require more privileges on your Mac. Specifically, “System Events” for “Automation,” which controls interface elements by simulating keyboard and mouse actions. Whenever you come across one of these apps for the first time, you’ll get a prompt on your Mac to give it access. Click “OK” to do so. You can see these privileges in System Preferences –> Security & Privacy –> Privacy –> Automation. Once you give it permissions once, it should work for any future Blocks you use.
Momentous Studios does not store any of your data or requests, so that should give you a little peace of mind. According to the devs, “all data is stored locally on your devices,” and you can view its privacy policy for more information. As of right now, the only downside to Gateway is that your iPhone and Mac have to be on the same WLAN network. If you want true remote access control, away from home, that’s not possible with Gateway yet. Hopefully, it incorporates a way to SSH (Secure Shell) into the Mac remotely from the iOS app. Until then, if you want that kind of access right now, you could try Chrome Remote Desktop, which turns your iPhone into a “mouse” and “trackpad” for your Mac as long as the Chrome Remote Desktop client is running on the Mac.
If you Want more Updates just Join our Telegram Channel
In This Post I am going to give you the method How to host Your Website On your Google Drive For free SSL Certificate.
So Hey Readers In this Post You Learn How can you Host Your Website Free With using Google Drive account, So Lets Start.
First of all Make one new Google Drive Account. Don’t use your personal account, just because its you safety.
Requirement:
Only new Gmail Account without any data.
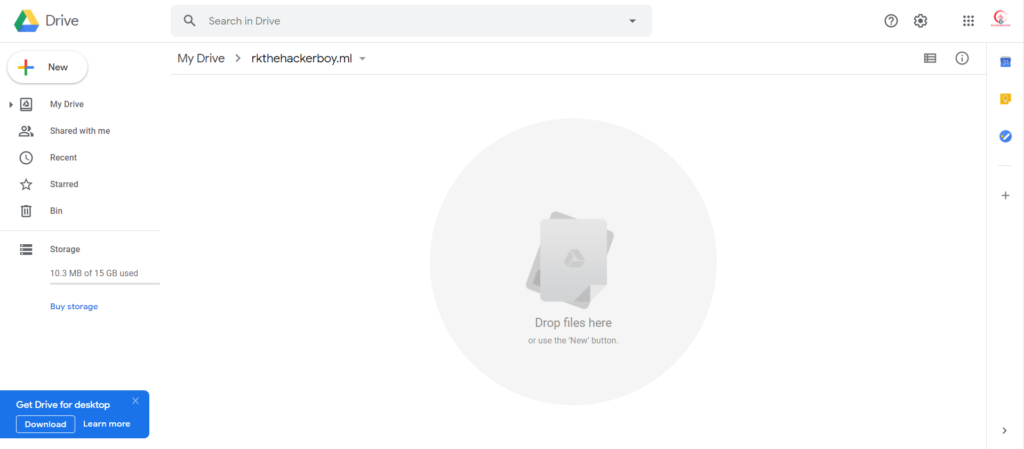
So First Login Google Drive with your new Gmail account.
Then Make a New Folder and give and then name the folder you want to keep for the website, if you choose your website name like Extrahacking.tk, ml or any domains you like, then your folder you right your folder name extrahacking.tk or any domain you which you like.
Convert your google drive into web hosting
Note : Your website name and your Google drive folder name both are same.
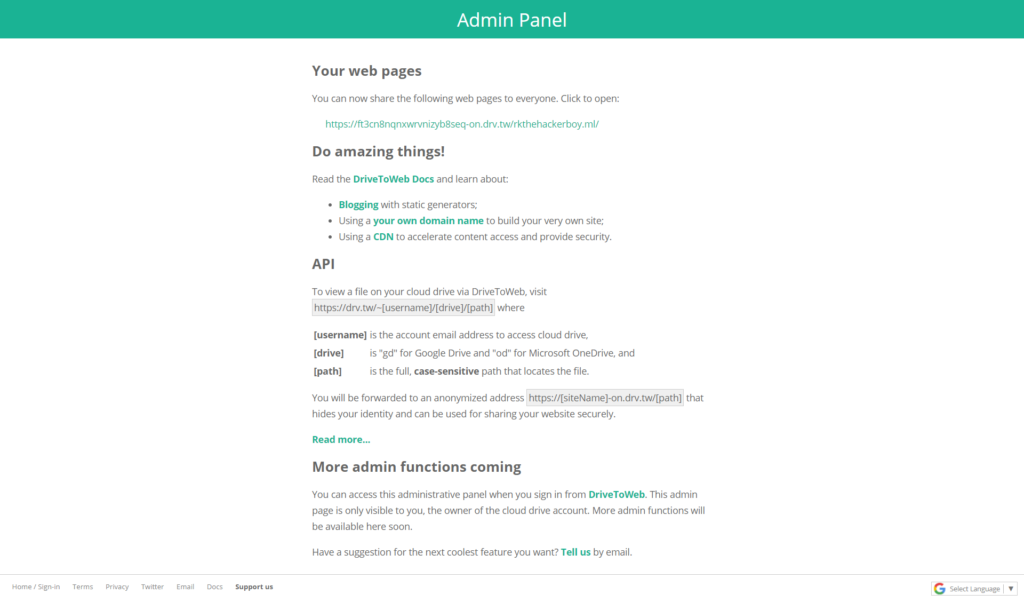
After complete this Now go to drv.tw and sinup with your google account. now it ask for permission for edit, delete and modify your google drive files, then click on the allow button
How to Use Your Google Drive As Like Hosting a website
After Click Allow Button, You land on Admin control page and you see one link, like give in screenshort.
How to set your google drive to host website
Open This Link and you see your website runing.. but you see your link is too long so lets short your link using costom domain.
How to Set Costom Domain on Your Google Drive Website :
Now go to Freenom.com for register an domain, Create an account and search your domain like i am using extrahacking.ml.
After select your domain click on checkout button and now you successfully get your domain.
Now go to My domain option and click on manage domain and now click on Management Tools and click to Nameserver, then select “Use default nameservers” then click Change nameservers.
Its take some time for Updating nameservers, SO you wait for it.
Now click on Manage Domain DNS.
Here We will create New record for point our google drive website, So Click On New Record Button.
In type option we select CNAME and In name section we enter WWW, and in Target paste your trv.tw website link and click on save button.
Its take some time for saving Your Record So wait some time and after Your Record updated you will access your Google Drive website using your costom domain.
If you guys want How to set SSL certificate on your Google Drive Website Comment me..
And If you like This Tutorial Give your Feedback in Comment section.
Share this Blog post with your Friends. Thank you !
Today In this post You can get How To Make Private Chat Server, You can easily chat with your friends Anonymously. You can use this Method for discuss Sensitive discussion. I can teach you this method using Termux.
So hello Guys I am RK. and I can give you this method, So if you Like Our Post Just Share With your Friends and Relative.
Requirement :
Termux App
Hacker Keybord
And some Copy paste Knowladge ?
How to Chat with Your Friends on Private Server :
Follow my Commands on your Termux or Copy paste commands :
First open the Termux and Type this command
$ apt update & apt upgrade
This Command Use for Update Your Packages. So its very importand Command.
$ pkg install ttyd
This Command Use to Install Package ttyd, this package helps to make server termux server .
$ ttyd -h
This Command is for Help
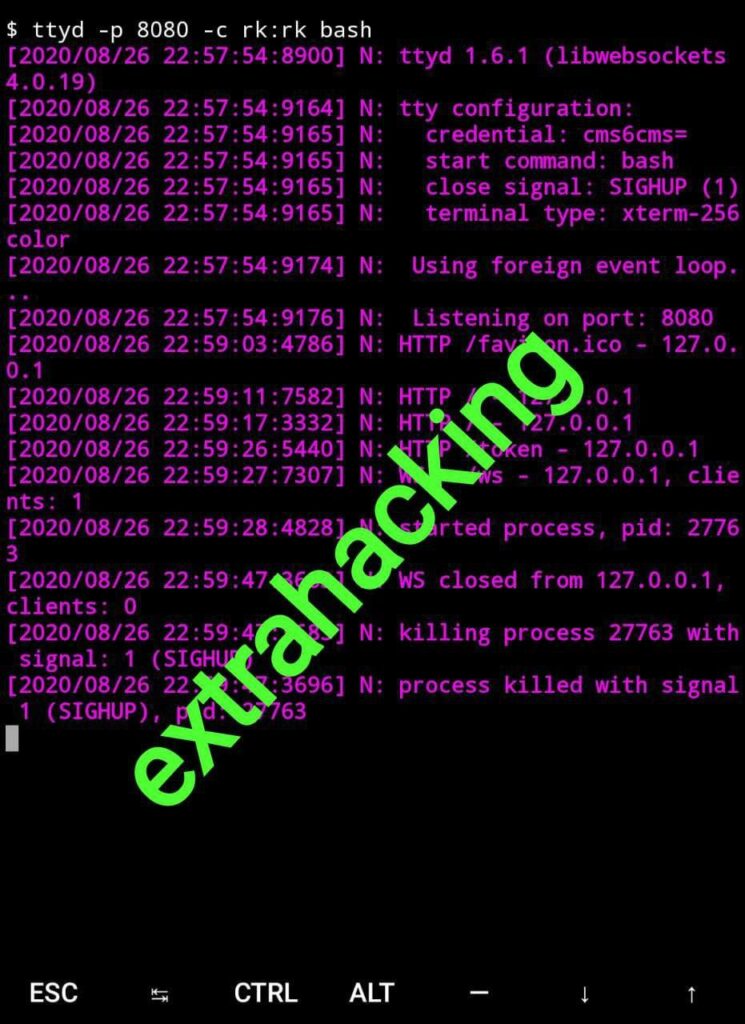
$ ttyd -p 8080 bash
This command is for active your termux server for use anywhere, here “-p” for port, you can enter any four digit port number.
note : You need ngrok for use termux anywhere… so make sure you install ngrok first, but if you dont’t know how to install ngrok comment me or Visit our youtube I will make video abour this.
But if you want to protect your terminal server by set usernam and password, then type this command on your Termux.
$ ttyd -p 8080 -c username:password bash
Here “-c” means set for username or password after “-c” you enter username then put semicolon and then enter password but don’t give any space on username semicolon and password (username:password)
Now after complete all command you see this type of interface on your termux.
How to Make private Server
Now Start New Session and Type this command
$ pkg install netcat
Its is package for create chat server
Now Type this Command
$ nc -lvp 44444
This command use for start netcat server, but here you see I am using % digit of port number, So You will also use 5 digit of port number.
Note : Don’t use ttyd port number
How to access termux on anywhere
After This start new session and start your ngrok…. I assum that you know how to install ngrok termux
$ chmod +x ngrok
$ ./ngrok http 8080
Start Ngrok and enter ttyd port number. Don’t use you netcat port number
After start all the servers Now copy the ngrok address and send to your friend for chating with friend, and say your say open the ngrok address to chrome and type this command.
$ nc your_own_ip netcat_port_number (44444)
Tell your friend for type this command on chrome terminal, and you give your ip (Means you can give your IP for enter on Your_Own_IP space.
$ ifconfig
Use this command for know your ip.
After your friend successfully type this command then you and your friend start the chat.
I hope you understart all these command if you face any problem comment below or DM me on telegram
Today I in this post we talk about How to use Whatsapp Without Number ….
I hope You all Guys Fine and fit in this corona or covid-19 Movement….You all thinking What is the trick?
What is Whatsapp?
WhatsApp is a text and voice messaging app that launched in 2009. It’s become incredibly popular since then, in no small thanks to its features and flexibility. As a free service, WhatsApp allows for messages and calls on both desktop and mobile devices.
Part of what makes this app appealing is that it works on various phone and computer operating systems, helping with messaging. It can also take advantage of Wi-Fi and cellular data to make one-on-one or group calls.
Here’s everything you need to know about Whatsapp.
Whatsapp Features..
Free International Calls
Free and Unlimited Messaging..
Video Calling Feature..
Run your cellular or Wifi both….
Sticker or Emoji Options….which gives your chat more intresting..
Its Avilable for All platform like iOS, Android or Windows
Its Give you GPS option, and its help you to share your live location with your friends and family…..
Can Your Whatsapp Secure?
Many people have dought about whatspp security, So whatspp is very secure plateform, i am saying this because its use end-to-end Encrytion.
In this time Whastpp have 2 billion active users in 180 countries with over 500 million daily active users. Whatsapp messanger is now the leading mobile Messaging App in over 112 countries. The app dominates in India, Germany, Russia, and the U.K. Despite its considerable virtues and impressive stats, WhatsApp isn’t the only game in town. Among the app’s competitors are Line, Imo, Kakao Talk, WeChat, Kik, and Viber Messenger. WhatsApp generally takes a broad approach to reach as many people as possible around the world.
Now We talk About The Trick.
Just think about using whatsapp without registering any Number, That will be very cool as you will be using the Whatsapp Anonymously.
Steps To Use Whatsapp Without Registering any Number.
First of all, SAve your Complete Whatsapp data to your and uninstall the existing Whatsapp account
Now, Switch your phone to Airplane Mode the Download and Install new Whatsapp on Your phone.
After that, Go with on-screen instructions and put your number there, don’t will not send the message as your phone is on flight mode.
Now, it will ask you to selectan alternative method to select for verification of your number. Then you need to select Check Through SMS.
Afterwards, Enter your email Address and Click on Submit button. Then immediatelyclick on Cancel button.
Now you need to insatll spoof messages apps of your device, If you have iPhone then install Fake-A-Message and if you have Android Phone then install Spoof text Message.
After that, Go to Outbox and send the detail to spoofed verifications. Use these details for that; To; +447900347295 From: Country Code, Mobile Number and Message: Your Email ID.
Now, these details will be sent to that false number and you may use that number for the verification of your Whatsapp account.
Now Done, Enjoy…
I Hope you Understand, How to Use Whatsapp Without Number.
IF you Like this trick Drop Your Comments…
IF you Like Our Method and Blog Just Join Our telegram Channel for more stuffs